


Bionic Arm
Published on 2021/11/11 7:43:58
Components Used in the Project
Description
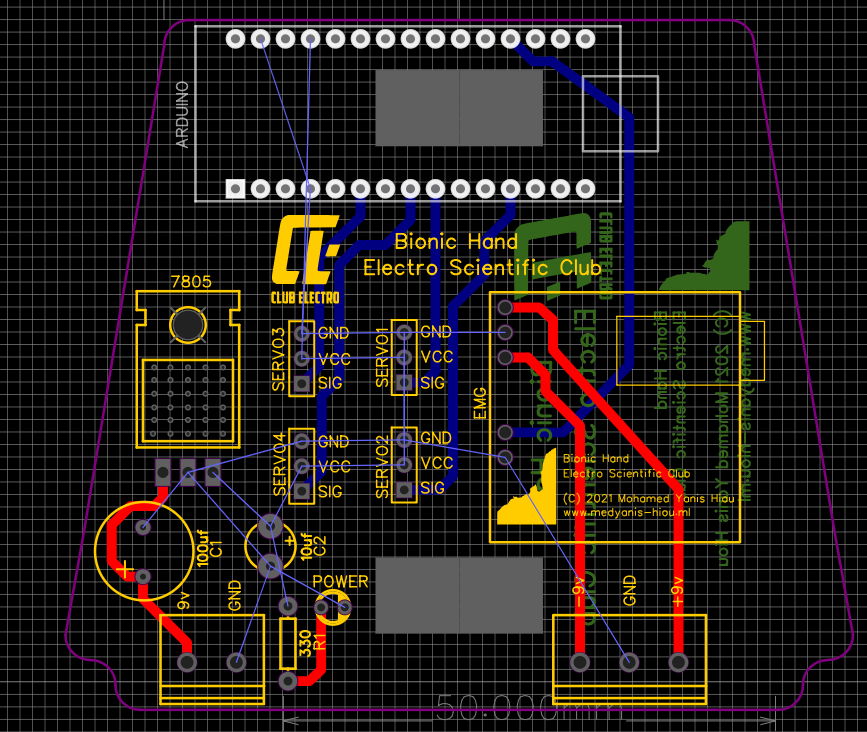
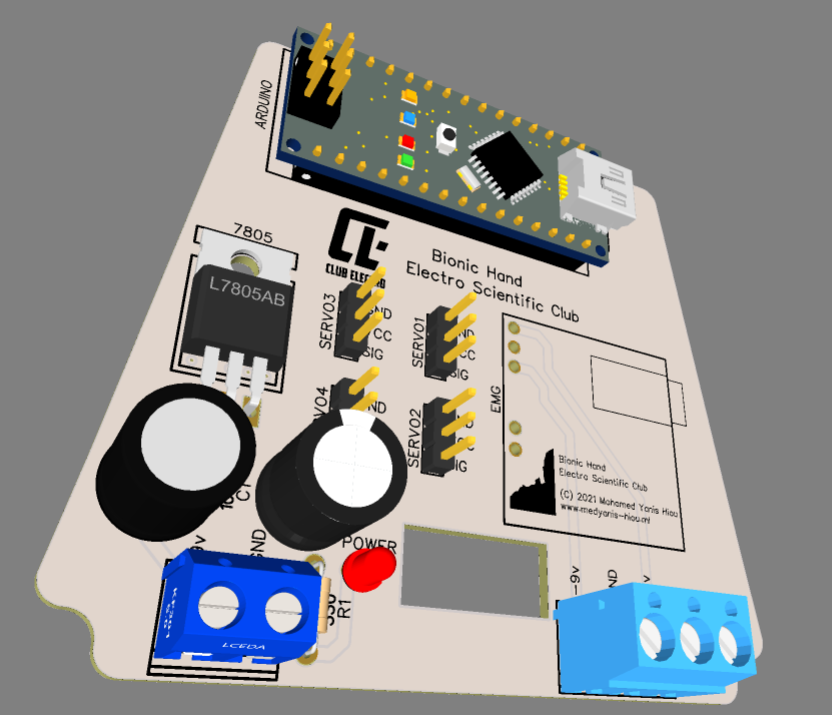
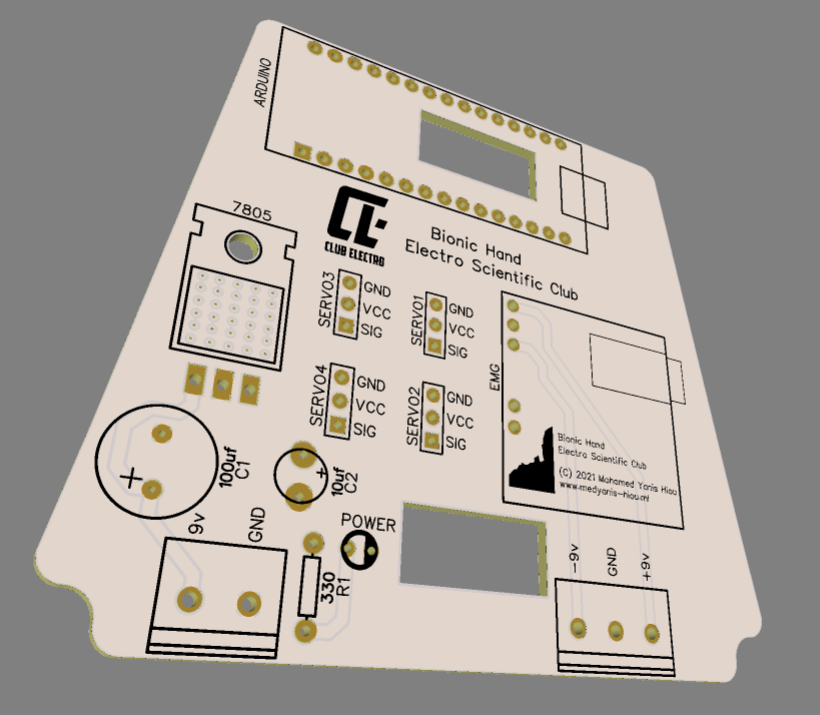
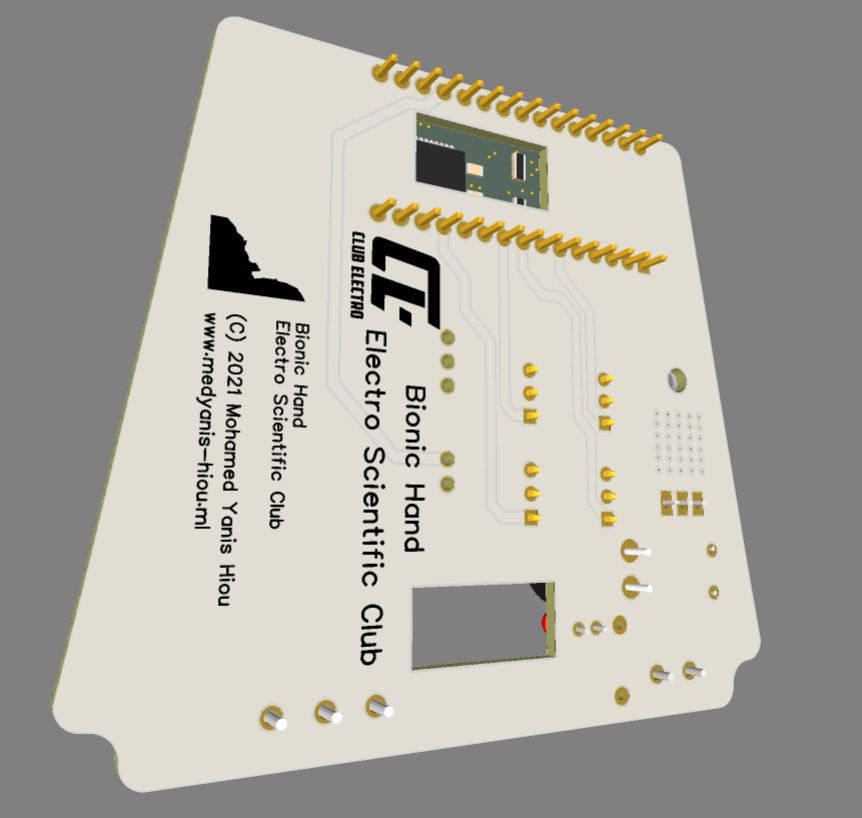
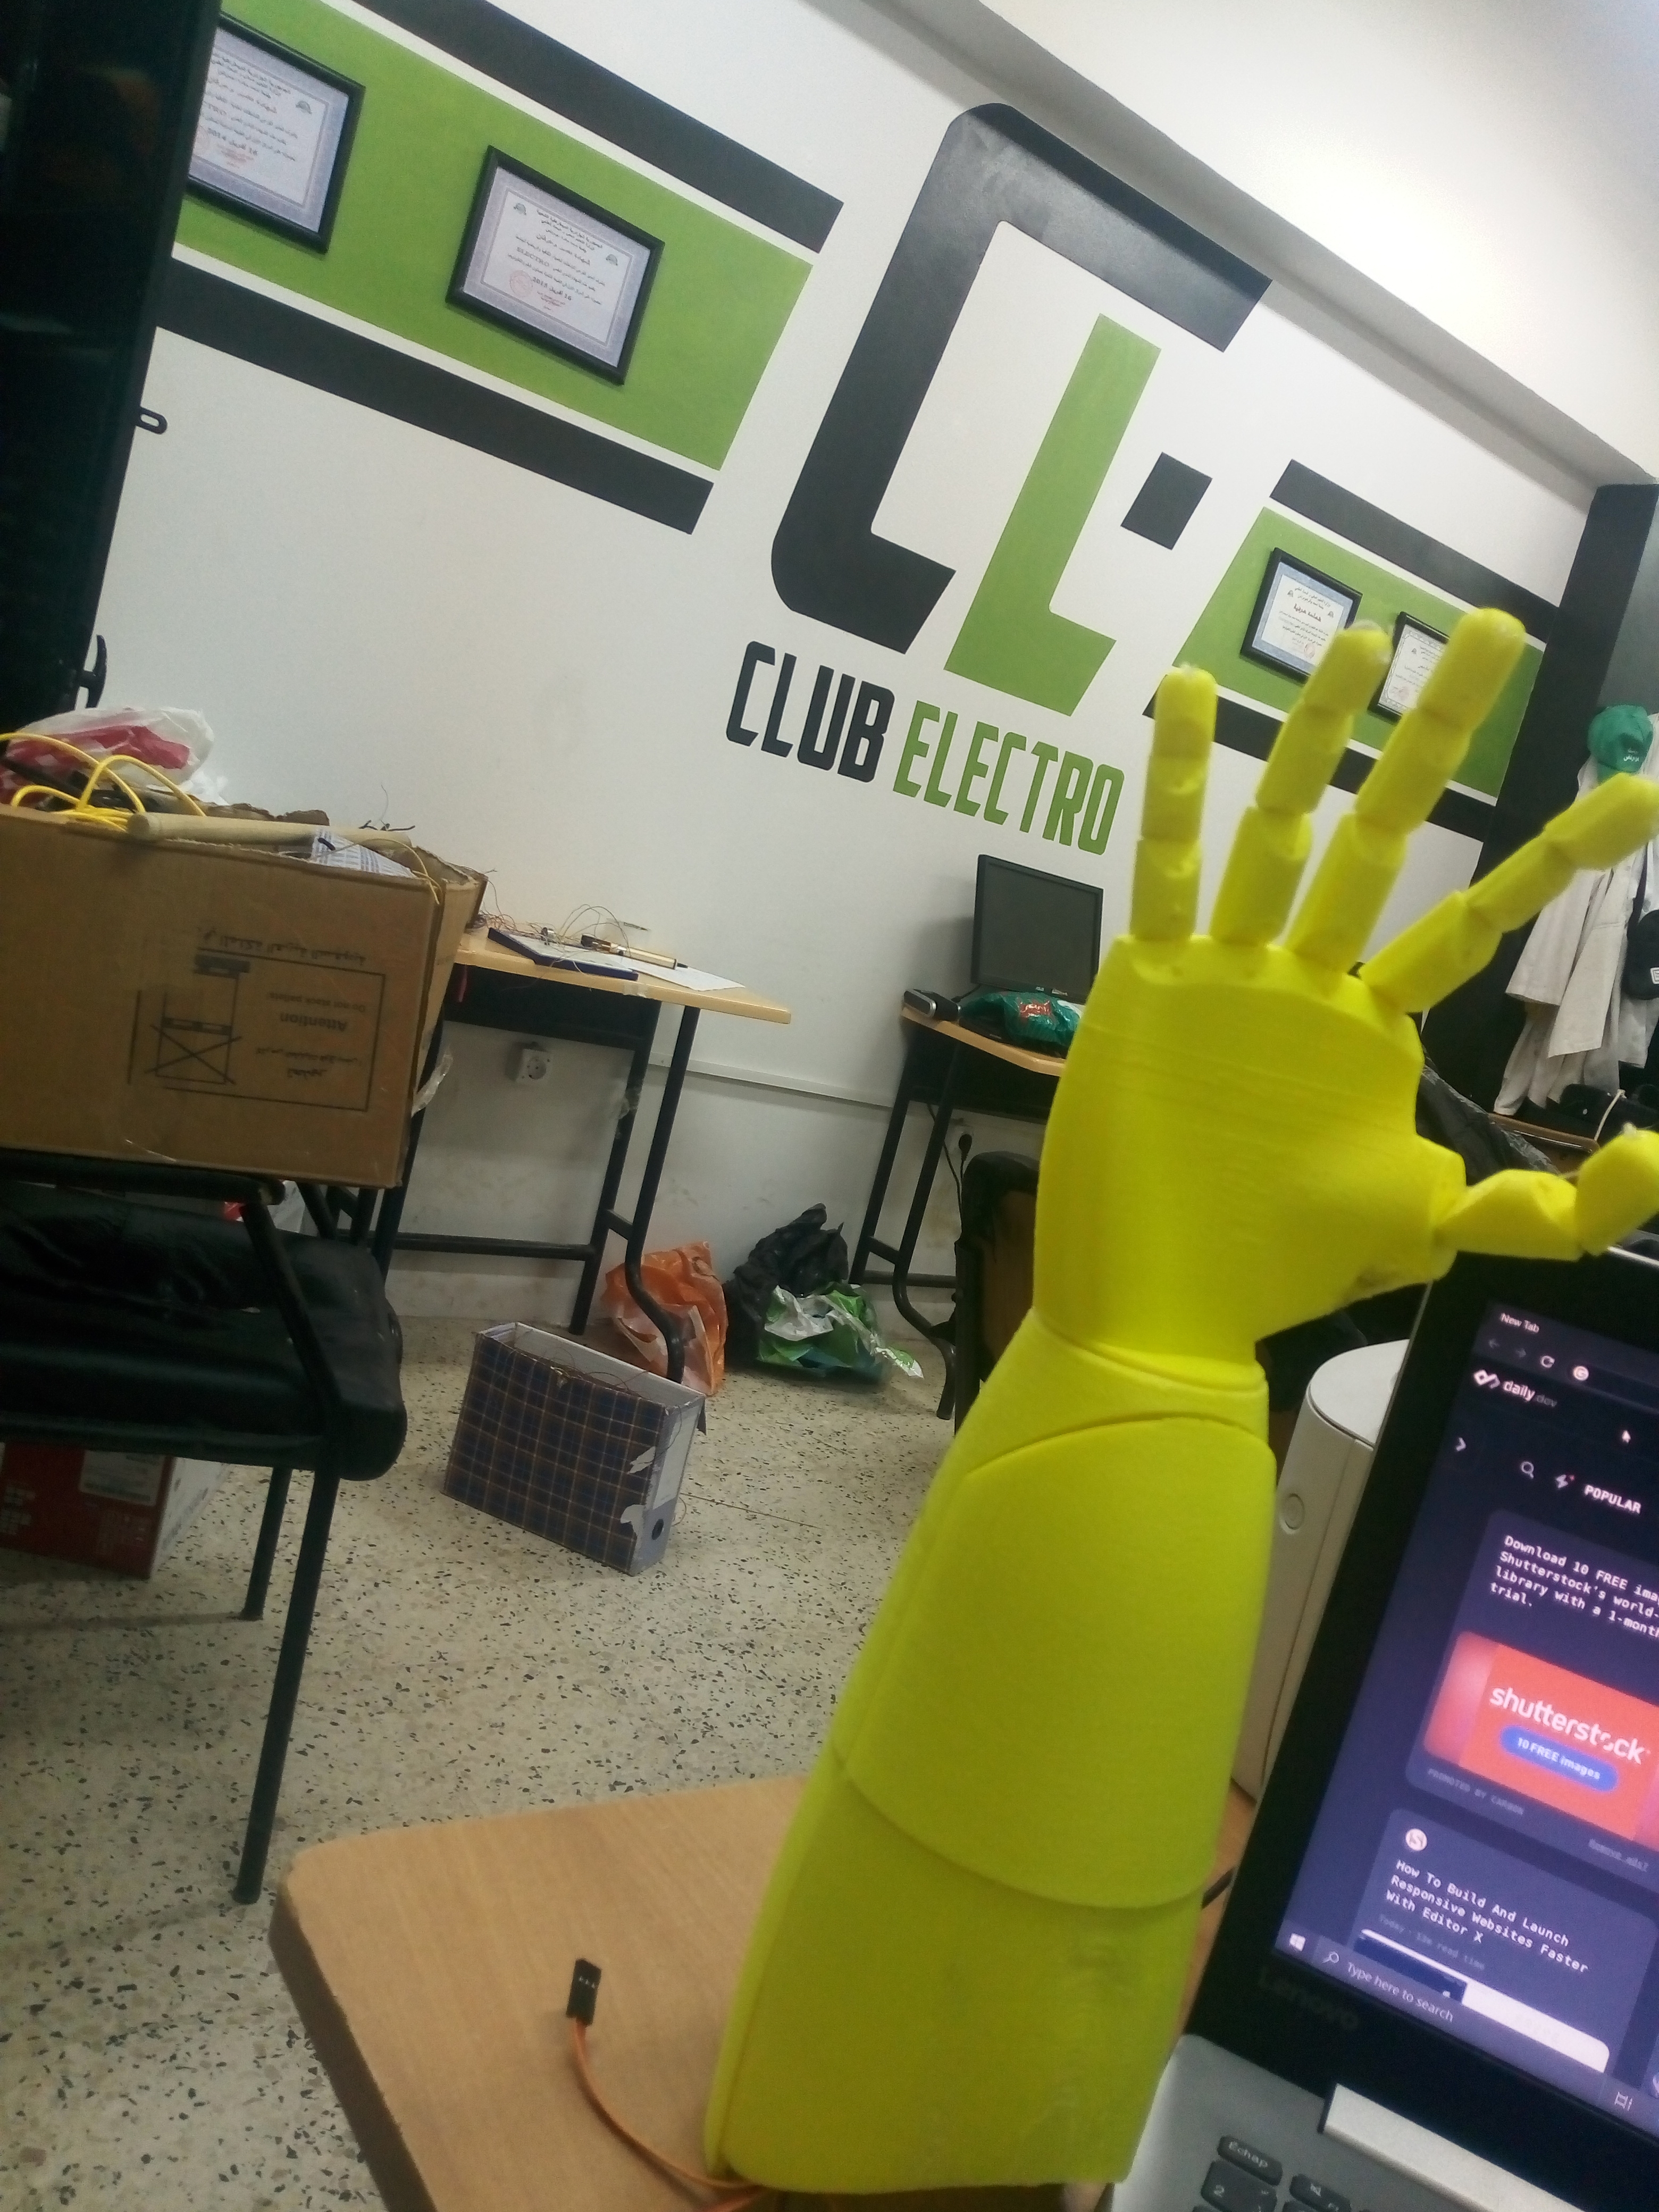
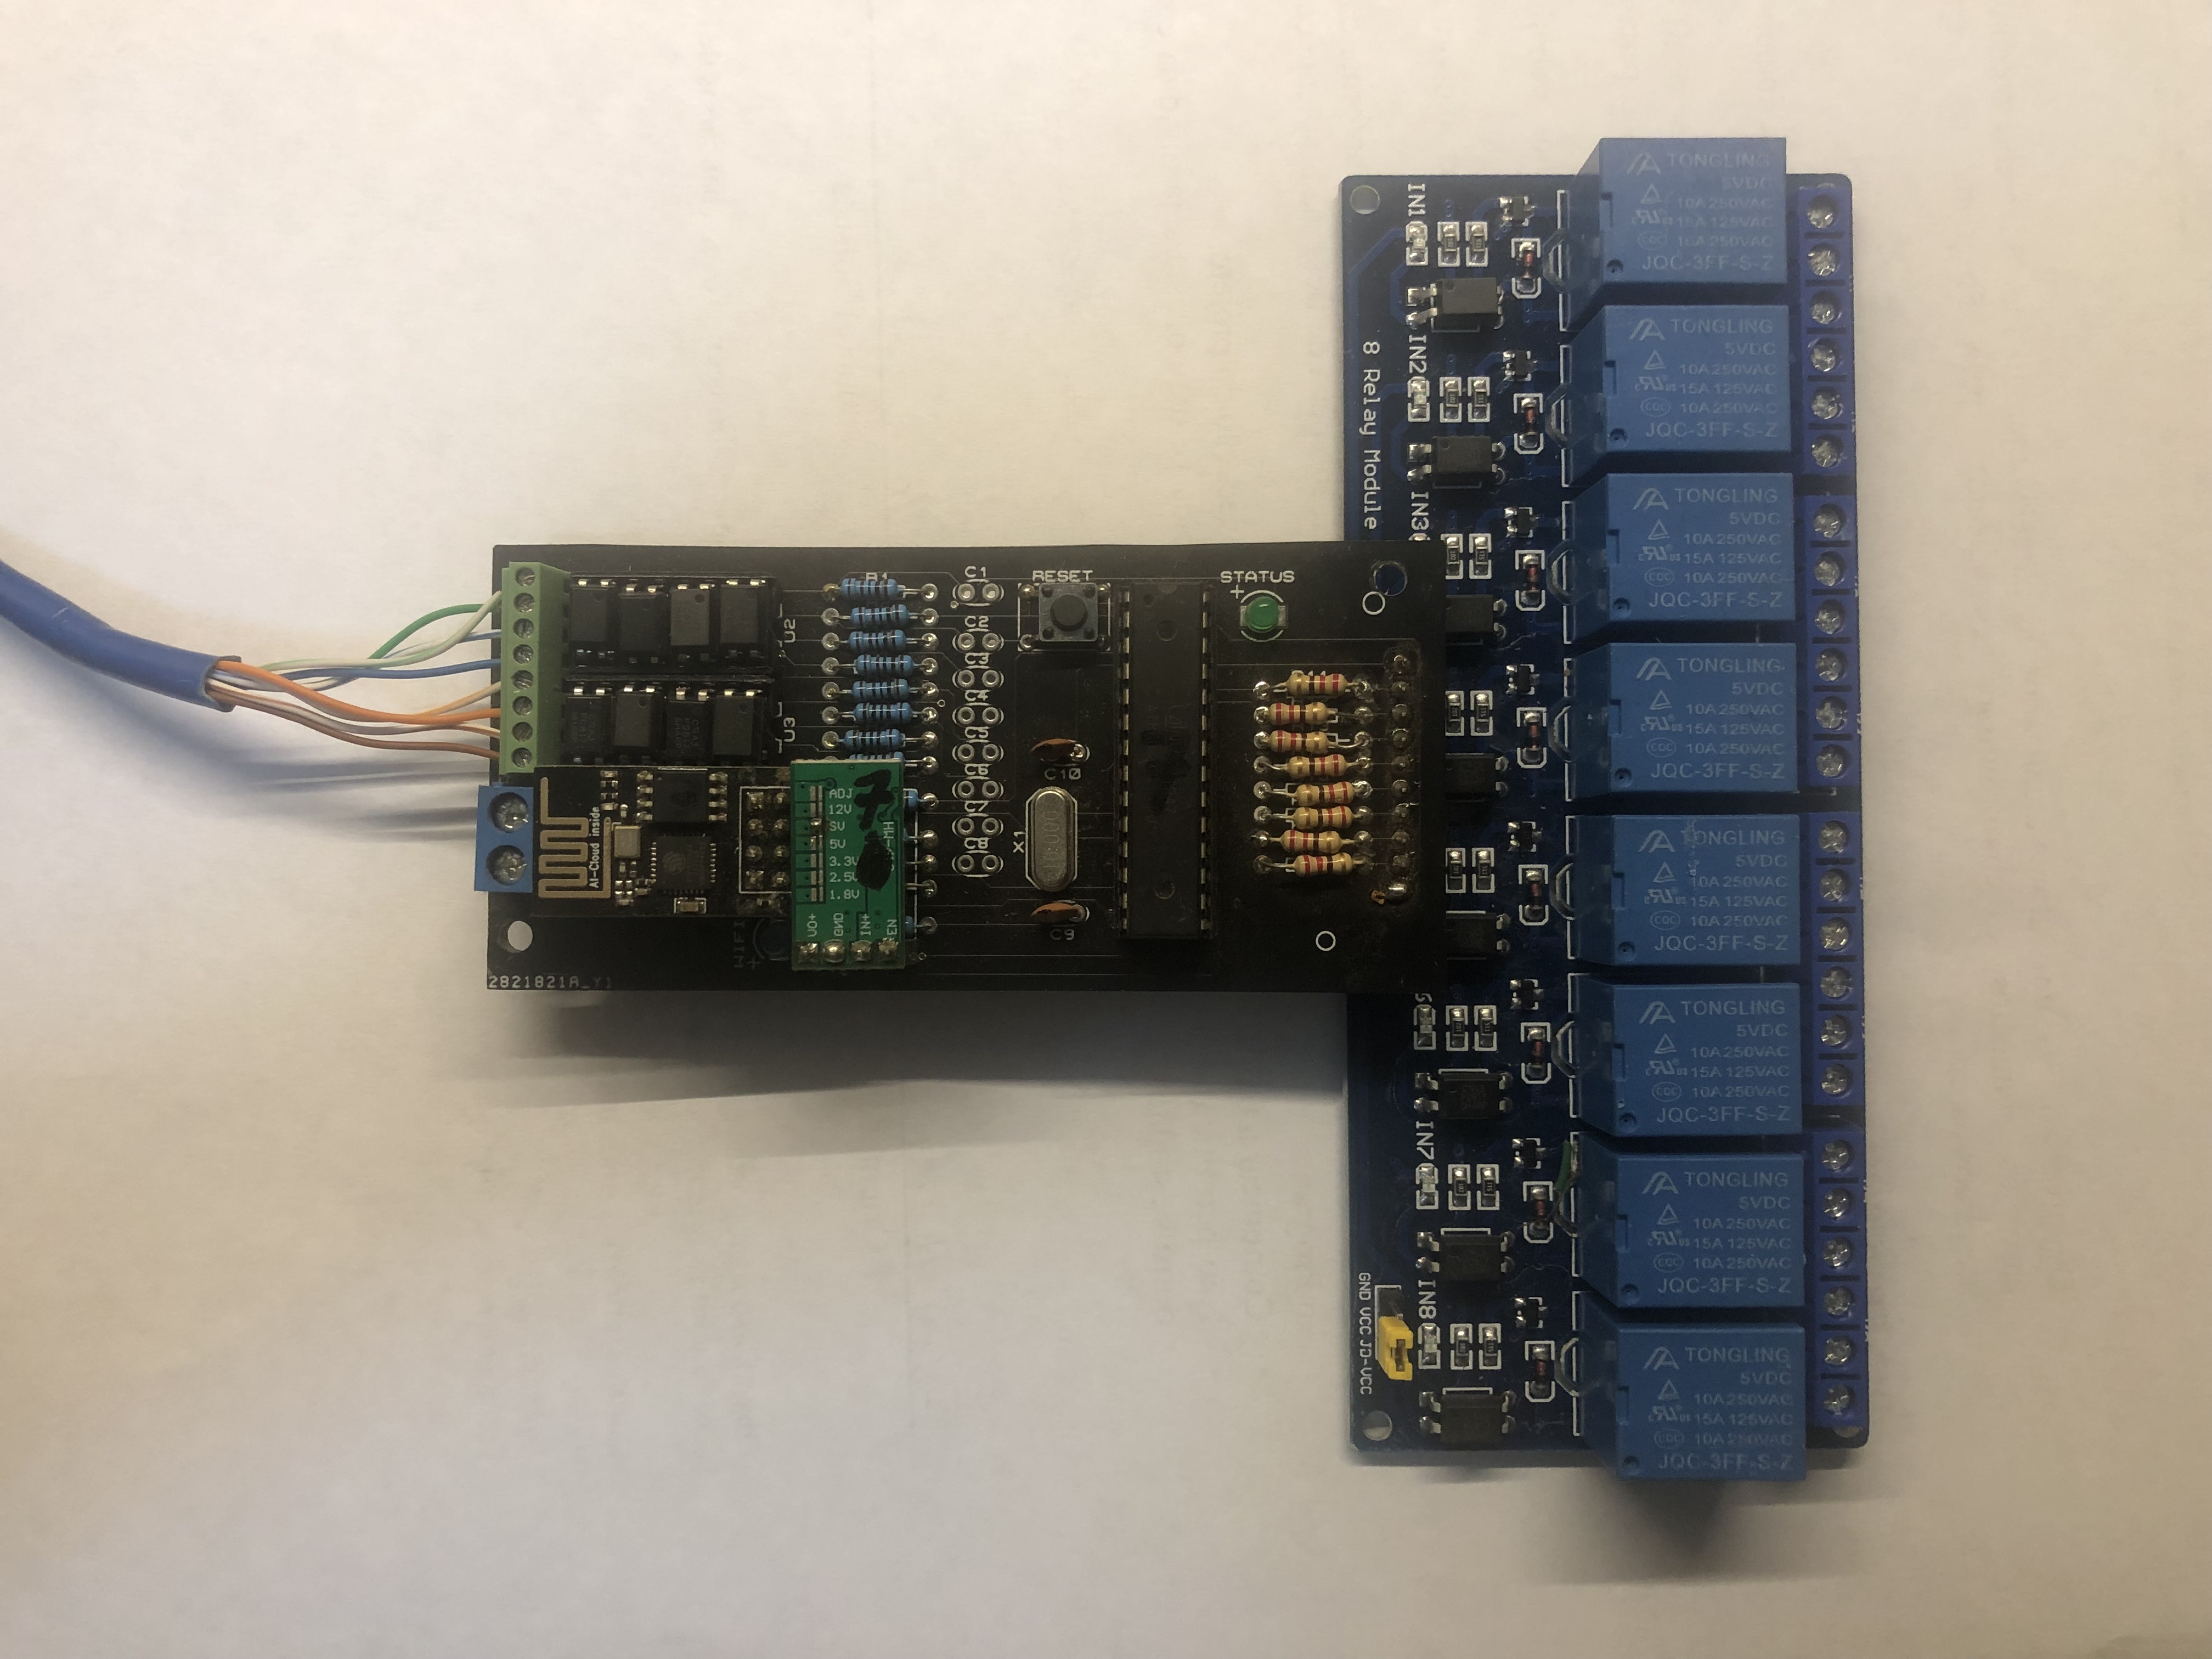
Many people get burns in car accidents and wars, or fall ill with diabetes, and this leads to cutting off a part of their body, and among these parts are the leg and hand. From here, the life of that person begins to write because he is unable to do things he loved to do before, or he becomes embarrassed and cannot leave the house for a long time. A bionic hand is a mechanical prosthetic hand that mimics the natural hand of a human being. It can do the same things that a human hand can do. This hand is designed according to that person and therefore a unilateral shape is designed and the design is changed according to the person. This hand is 3D printed with plastic as a raw material. For the PCB, the bordure is drew to place it directly to the bionic hand with exactly dimensions, it has an arduino nano as a controller and we have the EMG sensor to get the data from the muscles of the hand. EMG Sensor, also known as electromyography sensor is one that measures small electrical signals generated by your muscles when you move them! This includes lifting your arm up, clenching your fist, or even the simplest of movements like moving a finger! We read the data from the EMG sensor with the arduino nano and then we send it to the pc via UART communication protocol by USB to do some signals processing and filtering it, when the signals become readable and clear we send it back to the arduino nano by the same protocol (UART), and then we classify the signals and we can use machine learning algorithms to classify it as well, but here we did a simple signals processing with MATLAB software, we used MATLAB because it is fast and easy for mathematical calculations. And after all of that, we can control the fingers with servo motors, and we added headers for each servo motor. For the power, we use 3 Batteries of 9V, 2 of them for the EMG sensor because we need 9V and -9V for it, and another battery 9V for powering the arduino nano and the servo motors, and of course there are the capacitors and regulator to reduce the voltage to 5V because the servo motors works with 5V. Finally, you can see the vias under the regulator, and those vias are thermal vias to reduce the temperature of the regulator, and we can add a heatsink for better protection.
5
comment
All comments
 Mohamed Yanis Hiou
2144
0
5
Rules about cashback: 1. Valid time: ALLPCB cashback activity will end on April 1st. 2. Capped amount: The capped amount of cashback for each account is $5,000. Each order can get a maximum of $2,000 cashback. That means every author can get $5,000 max. 3. Cashback range: The cashback activity only covers the corresponding PCB order. The order amount for other combined payment products will be invalid. 4. Clicking your own promotional link will be invalid. The same email address, shipping address, contact information, and phone number are all recognized as the same account. 5. ALLPCB has the final interpretation right of the cashback activity.
ALLPCB will donate 2% to the author for this promotion link.
Other Projects
Home / Industrial Automation low Cost with Arduino an ESP01
1768
0
314
 josemarjr